Friday, October 26, 2012

How Would You Design a Wallet? | Computer Science 1


Back in September, a few of us teachers from Castilleja went to the Stanford d.school to attend a public "crash course" on design thinking. When we arrived, we were shown to this large conference room filled with people from all walks of life. Eventually, the lead facilitator came in, gave us some brief instructions (but not much since the whole point of the afternoon was "learning by doing"), and we immediately got to work. Strangers were paired together and then in groups of four, we filed into a large room with movable partitions, writable surfaces and Post-it notes everywhere, and lots more facilitators waiting for us. For the next 1.5 hours, we immersed ourselves in a quick-paced, energetic, intense design exercise to reimagine the gift-giving experience. It was fun, exhausting, messy, inspiring, and chaotic, all at the same time.

The exercise made such an impression on me that a month later, when I was asked to host a faculty learning exchange workshop, I immediately thought of doing a similar activity. Instead of redesigning the gift-giving experience though, I used the wallet variation, because it would give people a more practical thing to design and prototype. Anyway, what's being designed isn't particularly important. What I cared most about is keeping the quick-paced, high-energy aspect of the exercise because it shows that yes, design can be messy, chaotic, and confusing... but that there are ways to work within this space to really understand what the needs are and then generate creative solutions to fulfill those needs.

I was glad that most of the teachers who came to the October workshop enjoyed the experience. What I didn't expect was that Ann Greyson, our computer science instructor, actually enjoyed the exercise so much that she asked to bring her entire CS class down to the lab to do the same activity! It turns out that as part of the unit on designing user interfaces, she wanted her students to really think about understanding the needs of a user and how to fulfill those needs... hey, that sounds familiar! 

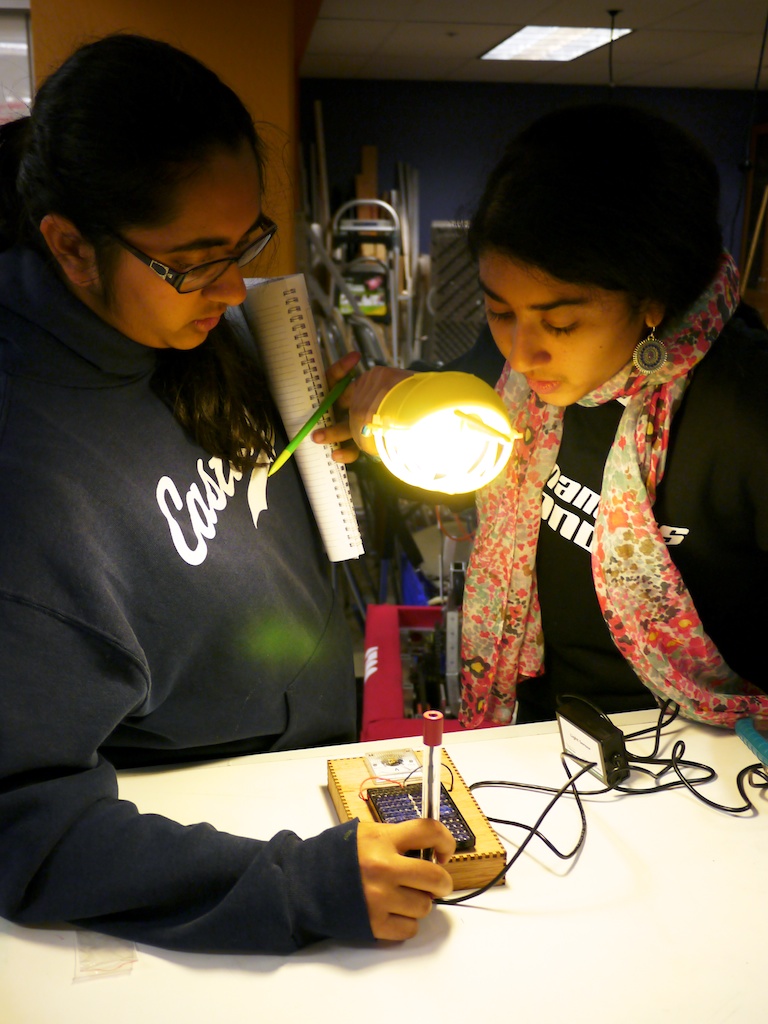
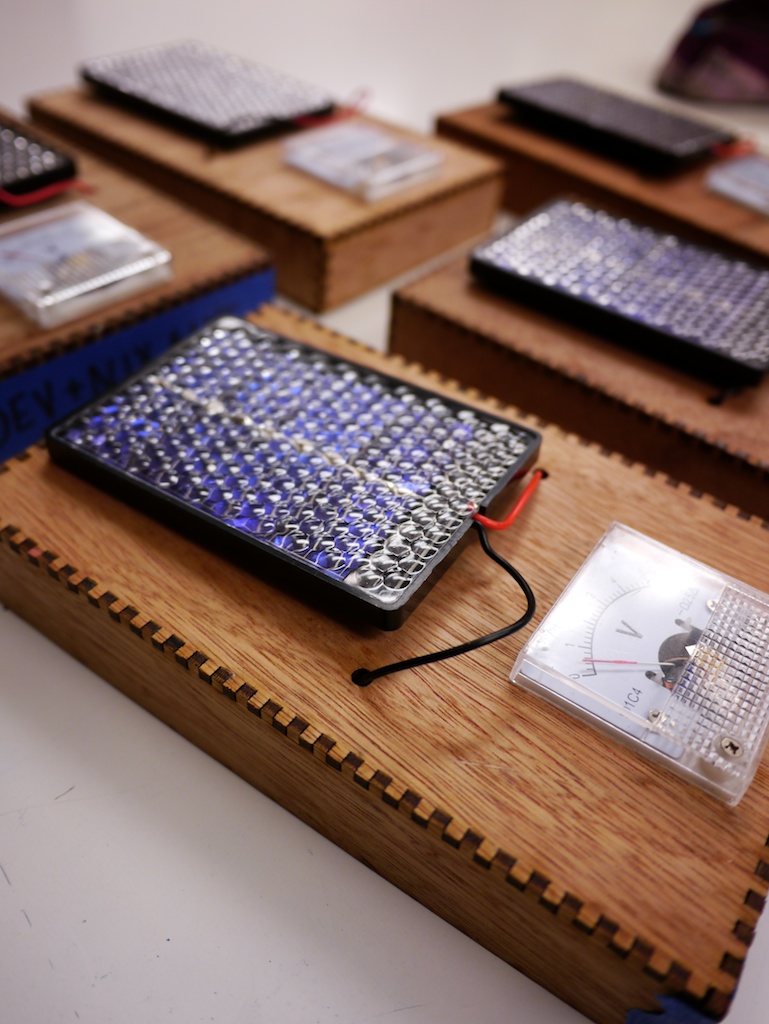
So this afternoon, a class of juniors and seniors gathered in the Bourn Lab, divided into pairs, grabbed Sharpies, and designed wallets for each other in a short 50-min period. Check out the photos of some of the prototypes, including one for a wallet that will come flying back to the owner when lost!

Monday, October 22, 2012

Measuring the Voltage of the Sun | Biology


Well, in a sense.

Before photosynthesis became a hot(!) topic in Elaine Middleman's biology class, she wanted to use solar cells as a way to show how energy from sun light can be converted to another form of energy. When Elaine approached us at the beginning of the year with this objective though, we didn't have any immediately great ideas on how we can plan such a lesson...mostly because none of us knew very much about solar cells at the time.

But we wouldn't let that stop us, of course! After spending some quality time learning about solar cells, we started looking for a source for them. Our go-to electronics shop sold these grab bags of chipped solar cells, but those turned out to be too rough and not ideal for a short one-class activity. Since class time is precious, we needed a more robust solution so we don't risk wasting time troubleshooting broken cells.

Luckily, it turns out there's a big market for solar cells for educational purposes, so we ordered a batch from Lego Education. (Since then, we've also found that there are other places with a larger variety of cells.) We also came upon some old-school, analog voltmeter panels for hooking up to the cells. Once all our supplies came, it didn't take Diego very long to design a box to hold everything together, so the students can assemble DIY "solar meters".

After assembly, the students took their devices around campus to take measurements of how voltage varies in sunny spots versus shady groves versus indoors. Unluckily for the period 2 girls though, the activity ended up on a rainy day! To give them some variations in lighting without having to go out in the rain, Hong dug through his tool chest and brought out his super bright work lamp (which surprisingly got pretty close to the voltage reading of direct sun).

So if you are curious about the "voltage of the sun," just ask one of the girls in Dr. Middleman's class.  Or better yet, try making your own "solar meter"!

Tuesday, October 16, 2012

The Law of Sines | Algebra 2


Last Friday, Kyle Barriger came by the lab with an idea. In his Algebra II classes, the students are learning about the law of sines. (And truth be told, I had to ask him to be my math teacher for a moment and remind me what the law of sines is!) While students generally have no problems visualizing when the law results in no solutions, understanding why there can be ambiguous cases where there are two solutions seems to be much more difficult.

So Kyle thought maybe we can build some sort of contraption to physically show this concept. After some quick planning and sketching on the whiteboard tables, we got to work building such a contraption.
There were a few design requirements we had to keep in mind:
- a way to set a fixed angle of a certain degree
- a fixed length for one side of the triangle
- variable length for the pivoting side of the triangle
- a way for the pivoting side to actually pivot

A few cardboard prototypes later, we were ready to print out our contraption in wood and assemble it using a few screws and nuts. To fulfill requirement #3, we made various lengths for the pivoting side that can be swapped in and out. We even scavenged some strong magnets from old name tags so the whole thing can be stuck on a whiteboard!

During our initial meeting, we had also discussed the idea of having the students build their own contraptions to explain this law. So in today's class, after Kyle used our wooden version to review the law of sines, the students got to work building their own models with everything from pipe cleaners to string to popsicle sticks.
Although many groups weren't able to fully finish their "explanation contraptions," we enjoyed watching how this hands-on activity got them moving and talking and even witnessed some "ah-ha” moments! Now if that isn't a lovely result for such a quick and simple project, I don't know what is.

Wednesday, October 10, 2012

Project "Casti-Cam" | Film 1


A few weeks ago, one of our arts teachers Winter Mead came by the lab to chat about a potential project for his Film 1 class. He had an idea to ask the girls to design and build prototypes for their own Steadi-cam rigs! He also wanted to emphasize the use of the design thinking process, in that they should build quick prototypes, test, and iterate. Kind of a "fail early, fail often" model, although I generally prefer to think of it more as a "test early, iterate often" model because when you learn something from each attempt, it's not an exact failure, right?

On the day of, the girls were divided into three teams. We originally had the idea that we would not allow them to research online for this project, but soon realized that's both impractical (since they are surrounded by computing devices all day long) and not exactly true to how one would solve real problems these days. Instead, we only asked each team to generate ideas for their "Casti-cams" without using their computers on the first day. Then they could all go home, do some research online, and come to the second day of class with a plan in mind. 

After gathering supplies such as PVC pipes, connectors, cheap Harajuku backpacks, 1/4 20 screws, and large binder clips, the girls got to work! Although each team used some sort of counterweight system, you can see from the photos that they came up with very different designs. Our teaching intern Zubair was on hand to assist and ended up teaching everyone how to use the PVC cutter, which became quite a popular tool in the class.

On the final day of the four-day project, Winter came up with a short challenge - each team had to use their Casti-cam rigs to film and track subjects through a variety of bumpy situations, from walking up and down stairs, opening doors, and running around the circle. When we watched the footages of the challenge later, it was not only really cool to see which design resulted in the steadiest shots, but also how some cheap hardware store items can give you a pretty decent Steadi-cam!